Hi Guys,
Hope you liked my last post desribing how to configure and work with JMS adapter.In this post I am going to show you how to deploy any SOA composite from JDeveloper to Enterprise Manager Console(EM). Though, this has been covered in my last two posts as a part of complete tutorial.Still for all those who dont want to go through the complete post.Here's stet by step instructions to deploy your SOA Composite.
Prerequisite for this tutorial
1. Oracle JDeveloper
2. Weblogic Server up and running
I have done this tutorial using JDeveloper 11.1.1.6.0 and Weblogic Server 10.3.6.0. Deployment from JDev for 11G versions is same for all.
1. Open up JDev and any recent project that you have completed.Right click on the project and select Deploy --> "your composite name".

2. Deployment window will pop up asking you to whether you want to deploy this composite to an application server or you want to compile your project and create its SAR (SOA Archive) file.Select "Deploy to Application Server",since we are deploying it to EM and click next.

3.Deployment configuration window will come up.
- It will show your project name, current revision ID and New Revision ID(change it,if you want to deploy your project with new revision ID other than current ID).
- Check mark the "Mark composite revision as default" if you want this version of your composite to be active and start receiving requests,otherwise uncheck it.
- If you are not changing your revision ID and redploying with same revision ID check mark "Overwrite any existing composites with same revision ID". SOA configuration plan lets you deploy your composite by choosing configuration plan. Will publish separate post explaining the concept of SOA Config Plans.Click next.

4. In the next window choose the application server you wish to deploy your composite on. If you havenot created your application server yet or dont know how to create app server connection GO HERE. You can have separate application server connections depending upon your environment such as test, dev, pre prod and prod. Choose the appropriate one and click next.

5. In this window you need to select the partition on which you want your application to be deployed.There can be number of partitions on EM console. Select the partition which you want to use , we are using "default" in our case.Click next.

6.Final window will give you deployment summary showing all the details that you selected in previous steps.Cross check and verify.Click finish to start the deployment.

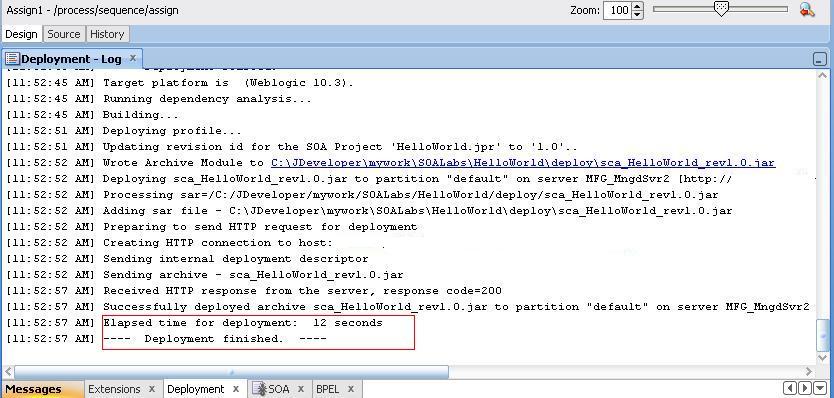
7. Examine the deployment logs in JDev during deployment and verify composite has been successfully deployed.In case of any exception while deployment proper error will be logged in deployment logs.
8.Open up your Enterprise Manager(EM) and log in.After logging in drill down to the partition you deployed your composite and verify its there.
Thats it now your composite is active and accepting requests.Hope you got all the steps.Apart from this method of deployment there are other methods of deployment as well such as deploying directly through EM or deploying using ANT scripts. In forthcoming posts will explain those as well.
Stay tuned in.......
Happy Learning
Cheers,
Good One for Beginners
ReplyDeleteAll the blogs posted by u are explained in such a basic language and good manner which can be easily implemented by folks like us.
ReplyDeletePeople who are newbies can never ever get or find this kind of explanation to learn and implement SOA SUITE 11G .
You have not only mentioned the step by step procedure but also explained the significance of all the things and steps which is really very helpful.
Awesome blogs karan.
Desperately waiting to implement all ur upcoming blogs!!!!!!
Thanks a tonnnnn J J J J
Pooja